ObjectStore Active Toolkit Tutorial

Chapter 1

A Visual Basic Application with ATK ActiveX Server

Introduction
Using ATK ActiveX server, you can display tabular views from an ObjectStore database without coding a complex application. ATK provides an object model that you can use with any ActiveX-compliant development tool, such as Visual Basic. Using the classes and methods in the object model, you can easily inspect the database from the development environment that best meets your needs.

Software requirements
To complete the exercises in this chapter, you need these software resources:
ResourceWhere to Find It
Database

\odi\ATK6.0\Examples\demodbs\carsdemo.db

Visual Basic projects

\odi\ATK6.0\Examples\Tutorial1

In this chapter
In this chapter, you create a Visual Basic application that uses the ATK ActiveX server to retrieve tabular information from an ObjectStore database. This chapter contains these exercises:
ExerciseDescription
Fill a List Box with Data

Open an ObjectStore database and display data from a specific data view.

Fill a Grid Control with Data View Content

Display the contents of a data view in a grid control.

Fill a List Box with Data

Overview

The simple Visual Basic application you construct in this chapter opens the ObjectStore carsdemo.db database. It uses a list box to display the contents of a data view you define using ObjectStore Inspector.

Tip: In order for the ATK ActiveX server to retrieve data from a data view in the carsdemo.db database, the metaknowledge must contain the definition of the data view.

Process

To fill a list box with data, follow these steps:

  • Create a new data view to display in the Visual Basic application.
  • Customize the instance format.
  • Save the instance format as a grid template.
  • Save the new data view.
  • Create the Visual Basic ATK ActiveX Client.
  • Reference the ATK type library.
  • Write Visual Basic code to access the ATK ActiveX server.
  • Test the application.
  • Order the data by work order number.
  • Save the new data view.
  • Use the new data view.
  • Test the application.

    Building the Application

    1 Create a new data view to display in the Visual Basic application.

  • Start Inspector.
  • Open the ATK sample database \odi\ATK6.0\Examples\DemoDBs\carsdemo.db.
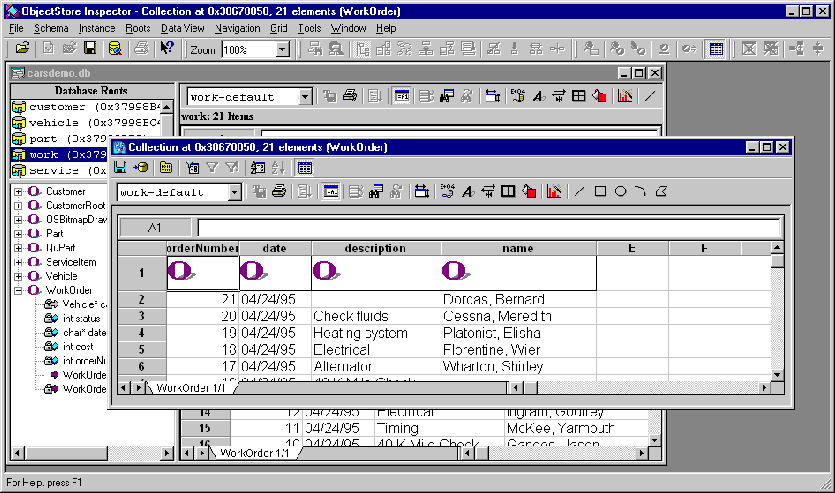
  • To create a data view based on the work root, double-click on the work root name in the Database Roots pane. The instance pane is populated with the extent associated with the work root.

  • Select Data View | Create from the menu bar. Inspector displays the new data view in an untitled Data View window.

    2 Customize the instance format.

    The instance format is a way to specify which data members are available to the application. You can save an instance format explicitly, as part of a grid template, or implicitly, as part of the data view.

  • Right-click anywhere in the data view grid.
  • Select Set Format of Class from the shortcut menu. The Instance Format dialog box appears.

    The left pane of the Instance Format sheet lists all data members in the data view; the right pane shows the members that have been included in this instance format.
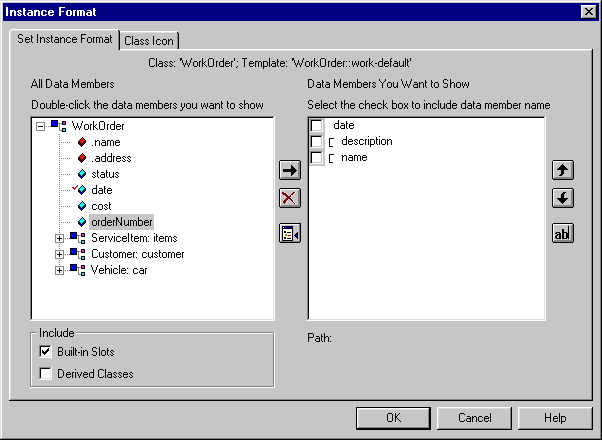
  • Include orderNumber in the instance list: select orderNumber from the WorkOrder class in the left pane, and click on the right arrow button.
  • Click car to display all members of that class that can be implicitly navigated, or reached by means of car. (For example, make, model, and year are data members that are related to car.)
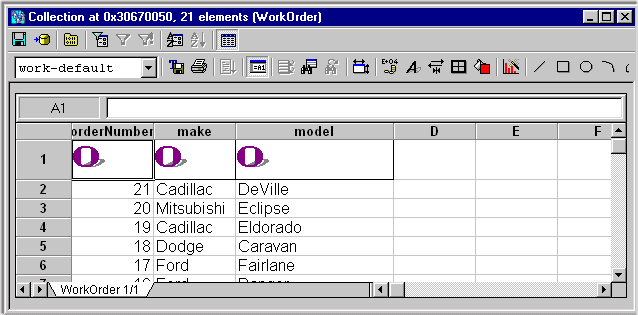
  • Include the make and model in the instance format. This allows implicit navigation from car to the make and model of the related Vehicle instance. The data view is refreshed based on these changes and now shows only the make and model.

    3 Save the instance format as a grid template.

    As mentioned earlier, you can save instance format information explicitly, with a grid template, or implicitly, as part of the data view. Instance format information saved with a grid template can be used by ATK - in fact, you can have ATK select any instance format associated with a data view when the instance format is saved with a grid template.
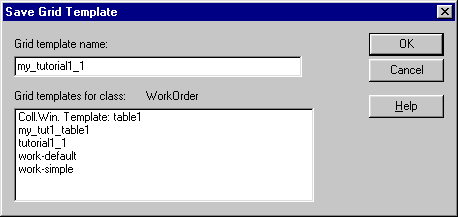
  • Select Grid | Template | Save As from the menu bar. The Save Grid Template dialog box appears.

  • Name the new instance format my_tutorial1_1.

    4 Save the new data view.

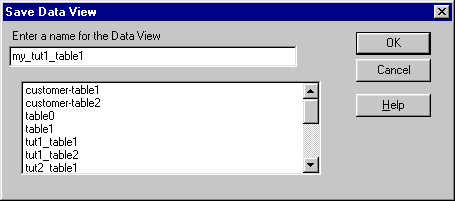
  • Select File | Save All from the menu bar.
  • Name the new data view my_tut1_table1.

    5 Create the Visual Basic ATK ActiveX Client.

    Now that you have created an instance format, create a Visual Basic ATK ActiveX client to display the data. Build a form with a list box that displays the items from my_tut1_table1 and a button to load and refresh the data in the list box.
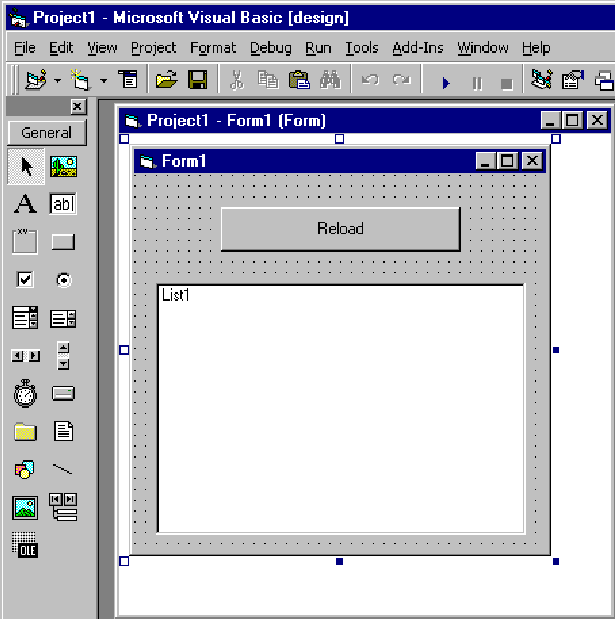
  • Start your Visual Basic development environment application, and create a new project. Visual Basic displays an empty form.

  • In the form, create a new list box.
  • Create a button with the caption property Reload.

    6 Reference the ATK type library.

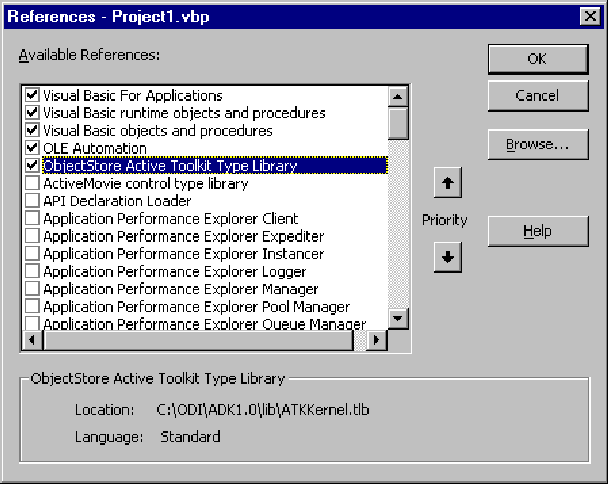
  • In the Visual Basic environment, select Project | References.
  • Verify that ObjectStore Active Toolkit Type Library is checked in the Available References list.

    If you cannot find the library, click on the Browse button and go to the odi\ATK6.0\lib directory. Select ATKKernel.tlb, the type library file. The ObjectStore Active Toolkit Type Library appears in the list.

    7 Write Visual Basic code to access the ATK ActiveX server.

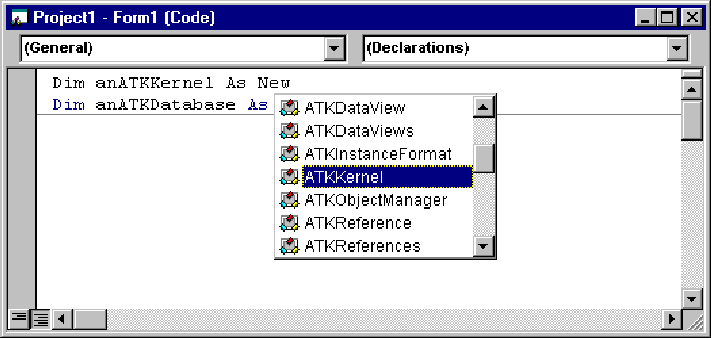
  • In the Declarations block of the Visual Basic form, declare two global variables containing ATKKernel and ATKDatabase objects:
          Dim anATKKernel As New ATKKernel
    
          Dim anATKDatabase As ATKDatabase
    
    The variable anATKKernel is also instantiated to an ATKKernel object.

    Tip: Because you referenced the ATK type library in your Visual Basic project, these ATK data types are available in the drop-down list box:
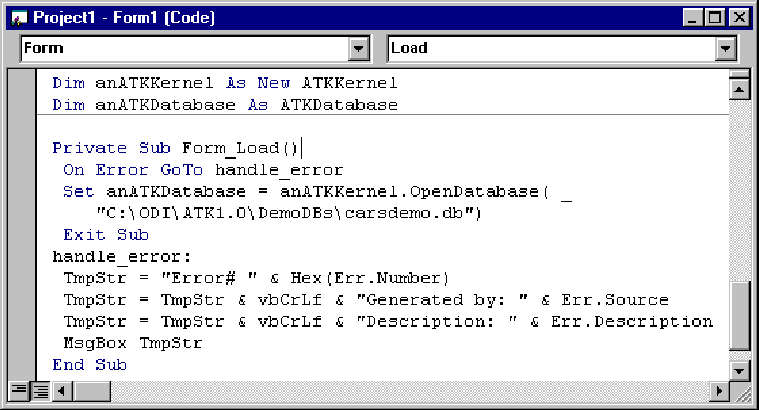
  • When the application starts, the form must be initialized with the appropriate data. Create a private subprocedure called Form_Load, using the Form1 code example as a model, to open the carsdemo.db database.
  • The application must be prepared to handle possible errors. Enter the handle_error code to do this:

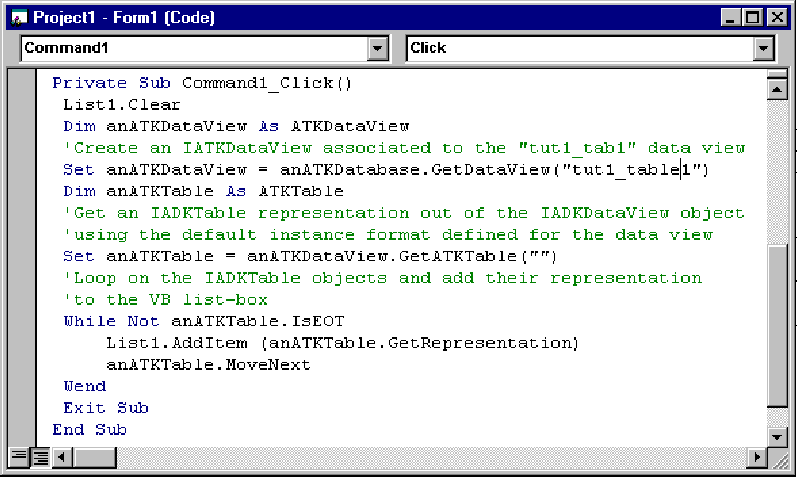
  • Create a private subprocedure called Command1_Click, using the code in the next screen as a model, to refresh the list box. When the user clicks the Reload button, the application must fill the List1 list box with data. ATKTable::GetRepresentation "flattens" the table columns for display as a single string.

    8 Test the application.

  • Run the Visual Basic application.
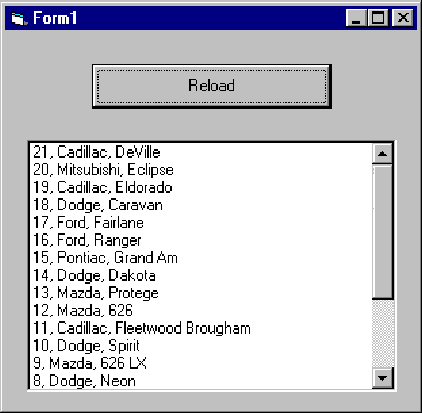
  • Click the Reload button. Data from my_tut1_table1 appears in the list box.

    9 Order the data by work order number.

    Modify the index path in the my_tut1_table1 data view. An index path is an ordered set of data members that users can navigate. Specify an index path that provides navigation from the WorkOrder to the WorkOrder::orderNumber data member.
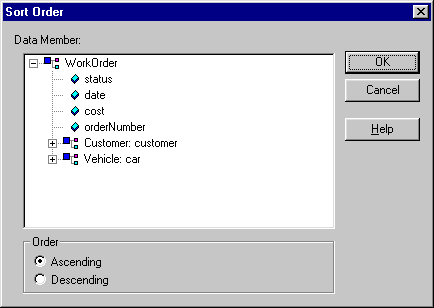
  • Open the my_tut1_table1 data view in Inspector.
  • Select Data View | Define Order.
  • Select WorkOrder::orderNumber as the index path:

    ATK orders the data view accordingly.

    10 Save the new data view.

  • Select File | Save As. The Save Data View in Database dialog box appears.

  • Type the name tut1_table2 and click the OK button.

    11 Use the new data view.

    To make the Visual Basic application open the new my_tut1_table2 data view, modify the command that retrieves the data view by changing the Set anATKDataview command. The change requires you to substitute my_tut_table2 for the previous entry, mytut1_table1.

    ...
    
    Set anATKDataView = anATKDatabase.GetDataView("my_tut1_
    table2")
    
    ...
    

    12 Test the application.

  • Run the Visual Basic application.
  • Click the Reload button. Data from my_tut1_table2 appears in the list box, in ascending order by orderNumber.

    Sample Code

    The Visual Basic code for this example is available in \odi\ATK6.0\Examples\Tutorial1\tut1_1.frm.

    Fill a Grid Control with Data View Content

    Overview

    This simple Visual Basic application displays the contents of a data view in a grid control.

    Process

    To fill a grid control with data view content, follow these steps:

  • Insert a grid control.
  • Customize the grid control.
  • Change the code that loads the form.
  • Modify the code that handles the button click.
  • Test the application.

    1 Insert a grid control.

    Visual Basic 5.x contains a MSFlexGrid grid control that displays and operates on tabular data.

  • Delete the List1 control from your form.
  • To insert an MSFlexGrid control, select Project | Component.
  • On the Controls sheet of the Components dialog box, check Microsoft FlexGrid Control 5. x

    The MSFlexGrid icon appears on the Controls toolbar:

  • To create an MSFlexGrid control in your form, click on the MSFlexGrid icon. The Form1 dialog box appears

    2 Customize the grid control.

  • Name the new grid control Grid1.
  • Set the AllowUserResizing property to flexResizeColumns.

    3 Change the code that loads the form.

  • Add these two lines to the Form_Load procedure:
          Grid1.FixedCols = 0
    
          Grid1.Cols = 5
    
    The value 5 is a reasonable default for the number of columns in the grid. The code now looks like this:

    4 Modify the code that handles the button click.

  • To retrieve the tabular representation of each object in the data view, and load data from each field into the proper grid cell, modify Command1_Click, as shown below, to refresh the grid.

    5 Test the application.

    1. Run the Visual Basic application.

    2. Click the Reload button. Data from my_tut1_table2 appears in the list box, in ascending order by orderNumber.


    Sample Code

    The Visual Basic code for this example is available in \odi\ATK\Examples\Tutorial1\tut1_2.frm.

    Summary

    In this chapter, you used ObjectStore Inspector to create a data view of the carsdemo.db database. You used the data view to define the data you wanted to query and a grid template to define the instance format, which controls the data member display.

    Next, you created a Visual Basic application to open the ObjectStore database, query the data view you created, and display the returned data in a list box on a form.

    Then, you replaced the list box with a grid control, modified the Visual Basic code to display the data in that grid control, and implemented a Reload button to refresh the data.

    Although this chapter focuses on using ATK with Visual Basic, these examples are also portable to other development environments that support ActiveX, such as Microsoft J++ or Borland Delphi.


    [previous] [next]

    Copyright © 1998 Object Design, Inc. All rights reserved.

    Updated: 05/11/99 11:49:31